Participation Metrics in Adobe Analytic
Adobe Analytics offers many interesting features, and in my opinion, the participation metric is definitely one of them. In this post I will talk about the benefits, why you should use them, and also teach you to enable them in your analysis workspace

What is a participation metric?
A participation metric is a visit based metric that assigns full credit from success events to all values of a variable.
In simple words, it allows you to determine which pages, campaigns or any other custom variable values are contributing most to your site’s success. It assigns full value to all the touch points that lead to conversion.
Let’s look at an example
The participation metric is often applied to revenue. If we want to know which pages customers visit before buying something, this would be an excellent case.
When you look at revenue, the value is allocated to the different touch points based on the selected allocation model. This can be “first allocation”, “last allocation” or “linear allocation”. If a customer goes from page A to B, then to C and finally buys something for 100$, revenue would be assigned as followed:
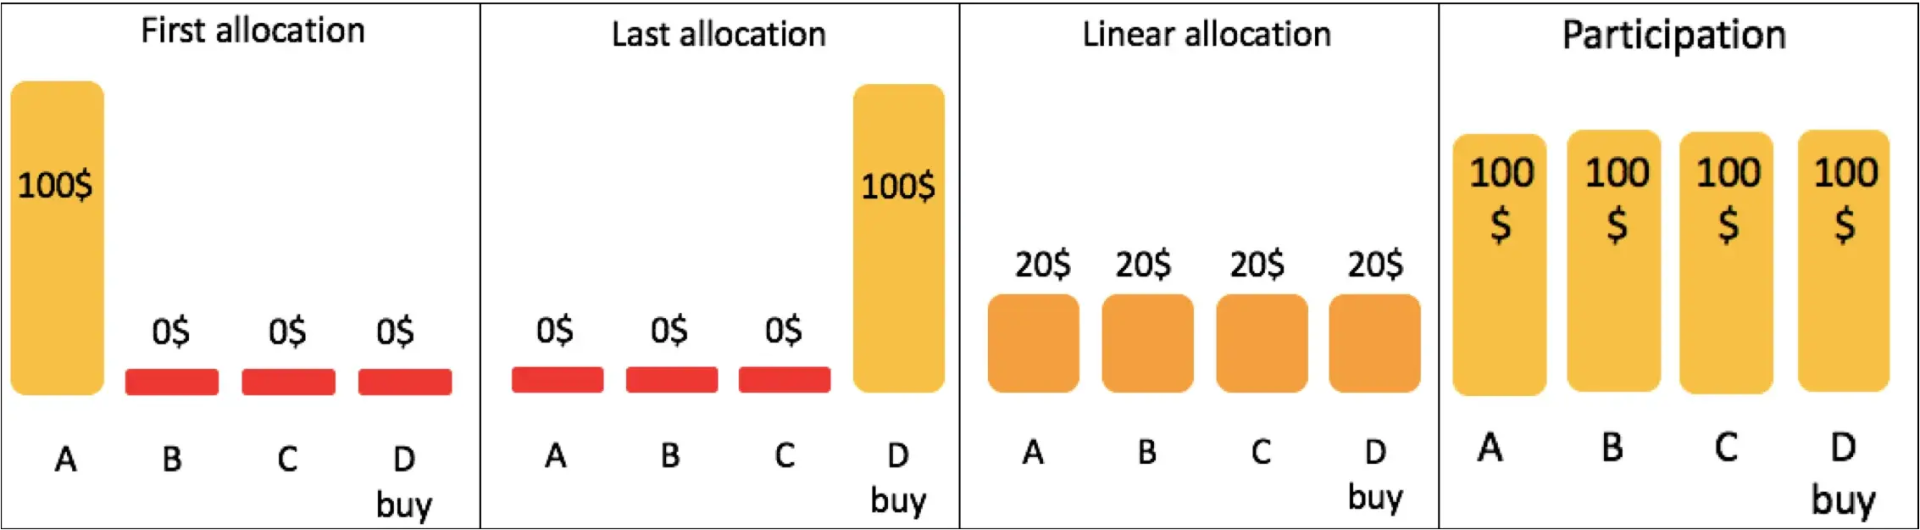
Linear allocation is the most used method. Participation is similar to this, except that full credit is given to all values.
Using this you can say, for example, “out of all purchases, 67% went through the home page”. This also allows you to determine the pages that do not contribute to purchases.
How to enable them in your analysis workspace.
Participation metrics are not available in your analytics workspace by default. Normally they have to be enabled in the admin section, both for specific custom traffic variables or out-of-the-box traffic reports. But there is a way to make participation metrics available in another, easier way:
Step 1: Go to the calculated metric builder
You can find this under “components” > “calculated metrics”. Click on add and create a new metric.
Step 2: Create a metric
Let’s continue with the revenue example. Start by giving it an appropriate title, such as “Revenue participation”. If you want, you can fill in a description as well. In this case, we can change the format to currency, since we are talking about revenue.
Next you just drag and drop the metric “Revenue” from the list on the left to the definition box.

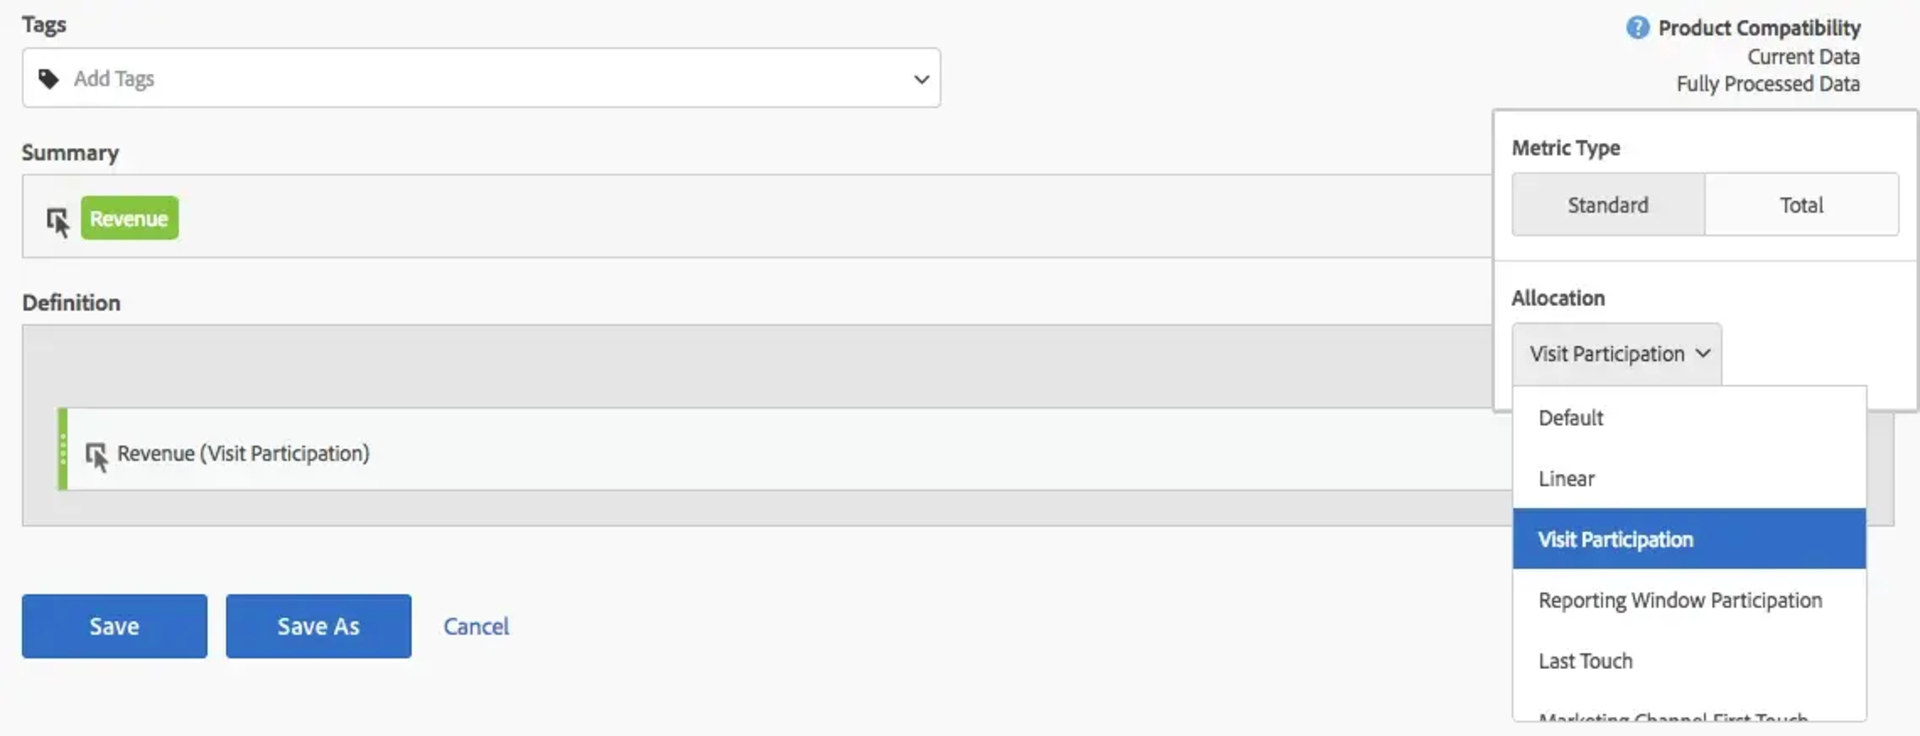
Step 3: set it as a participation metric
This is already the final step. It is that easy! The trick is simple. Next to revenue, in the definition box, you can select the “gear” icon (as indicated below) and select “visit participation”. That’s it, you created your own revenue participation metric.
The same procedure can be followed for any other conversion metric. Now your participation metrics are available everywhere, also in your analytics workspace.